Kode Lacak

Wednesday, April 9, 2014

Step by Step 3D CAD for beginners: Basic Tutorial

This is about Step by Step 3D CAD for beginners. Categories Basic Tutorial. What does it make you think of? Create your first peace of 3D in AutoCAD. Yea, I used to be so excited about 3D objects, specially when I will see a user exploring all sides of the object and be able to rotate it, zoom in and out.

3d
Here is a good exercise that will help you understand when and how to use certain basic command in AutoCAD.
These are for you to understand what we are aiming to design using AutoCAD . You have 2 2D views and the 3D view below. I have tried to provide all information about dimensions.

How to write text on arc in AutoCAD: Basic Tutorial

Here is how you can write text on an arc in AutoCAD in 3 simple steps. This is on categories Basic tutorial. You can learn tutorial step by step and more easly. so let us start.

textarcautocad
Step 1
Draw your ARC, using a circle and trimming it or using the ARC command.
Step 2
Go on the EXPRESS TOOLS tab, click on ARC ALIGNED TEXT and select the ARC you created in step 1

How to create a pipe in AutoCAD: Basic Tutorial


pipe-autocad
Here is a simple tutorial to help you grasp the principle of drawing or creating a pipe in AutoCAD.
In this tutorial , we will try getting the very basic peace of pipe it can be, just for the sake of illustration. Then using these techniques you can go ahead and create the most complicated pipe you need to.
And it is not only about pipes, since this can be useful as well in a multitude of other design issue you will come across in your projects.
Let get started

Sunday, April 6, 2014

5 Steps Preparing Your AutoCAD Plot: Basic Ttutorial


Tutorial about 5 Steps Preparing Your AutoCAD Plot. This is Basic Ttutorial. Plotting AutoCAD drawing can be tricky. Especially for people who just learn AutoCAD. Saw several posts in the forum saying they are confused how to do it. Why the plot result is not correctly scaled. Plotting is actually very easy. Simple. Just click plot or publish then you’re done. But there are some rules and steps you have to do when you draw and arrange your model in layouts, it’s already started when you create your file!

Plotting scaled drawings with AutoCAD 2011 - 2014: Basic Tutorial

Introduction. In this tutorial, you will learn How to Plotting scaled drawings with AutoCAD 2011 - 2014 in Autocad. This is Basic Tutorial.  You can learn tutorial step by step and more easly. so let us start.

Digimap MasterMap download
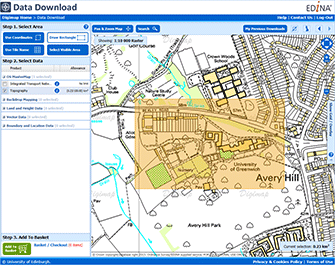
This tutorial assumes that you have downloaded some vector data (probably a combination of Themes from the MasterMap Topography Layer) from Digimap and that you have converted the data to the AutoCAD DWG file format using the InterpOSe translation application. However, you can follow this tutorial with any other AutoCAD drawing.

Once you have a drawing open in AutoCAD, it ought to be quite simple to plot it to a known scale but actually, it can be quite complicated for the AutoCAD beginner. The aim of this tutorial is to give you a clear, step-by-step sequence describing the preferred method of creating a scaled paper plot/print from your drawing.
The following tutorial is designed for AutoCAD 2011, 2012 and 2013 but can also be used for all previous versions back to 2009, it may not be compatible with AutoCAD versions before 2009.

Friday, April 4, 2014

Dynamic Block (Creating Column): Advanced Tutorial

In this tutorial, you will learn Dynamic Block (Creating Column) in Autocad. This is on categories advanced tutorial. You can learn tutorial step by step and more easly. so let us start.

Now let’s talk about what we want to achieve. We want one block that contain several column size. But column size is not supposed to be modified by freely stretching it. We have to limit the column minimum and maximum size. And we also have to set the increment value for this size, so the changes can be predictable.
column

If you’re not familiar with dynamic block, you should read this tutorial first. Basically we are doing the same thing, but there are some properties we are going to change. As we did when we create wall, we have to add some layers. Let’s add these layers:

Dynamic Block (Creating Wall): Advanced Tutorial

 In this tutorial, you will learn Dynamic Block Creating Wall in Autocad. This is on categories advanced tutorial. You can learn tutorial step by step and more easly. so let us start.

Dynamic block feature has opened many possibilities to enhance your AutoCAD libraries and your workflow. You can manage less objects in your library, and you can automate some process with it. In this first AutoCAD dynamic block tutorial, we will learn how to create an object with adjustable length. Many practices can use this process, but this time we will create a wall.
brickwall