
Here is a simple tutorial to help you grasp the principle of drawing or creating a pipe in AutoCAD.
In this tutorial , we will try getting the very basic peace of pipe it can be, just for the sake of illustration. Then using these techniques you can go ahead and create the most complicated pipe you need to.
And it is not only about pipes, since this can be useful as well in a multitude of other design issue you will come across in your projects.
Let get started
We will use the command called SWEEP, we could decide to use the EXTRUDE command too, but the SWEEP command makes it easier for us.
In order to use the SWEEP command to create a pipe, we need a circle representing the cross section of our pipe, and we need the path. The path has to be the perfect shape and length of the pipe we are seeking to create. So you want to be careful here by designing it well.
We will use the POLYLINE command to draw the path.

As randomly as it can be we will create a path, up and down, right and left.

Now what we want to do is have those sharp edges in a rounded shape using the FILLET command.

Yea, you noticed it. I created a circle which eventually represent the cross section of our pipe. Now we are good to go. We have all our requirement in place to create our pipe. A path and our circle.
You need to make sure that the path is one object, if it is not, you need to unite all those lines together for them to constitute only an object.
Joining many lines to form a POLYLINE (You should follow this only if your path is formed by many short segments)
- Write PEDIT and Press ENTER
- Select Polyline or [Multiple]: write “M” and press ENTER
- Select Objects: Select all lines
- Convert Lines, Arcs and Splines to polylines [Yes/No]? <Y>: Press ENTER
- Enter an option [Close/Open/Join/Width/Fit/Spline/Decurve/Ltype gen/Reverse/Undo]: write “J” and press ENTER
- Enter Fuzz distance or [Jointype] <0.000>: Press ENTER
- Press ESC on your keyboard.
Use the SWEEP command.

Click on the SWEEP icon, select the circle first (press ENTER on your keyboard) and select the line second. You should get this.

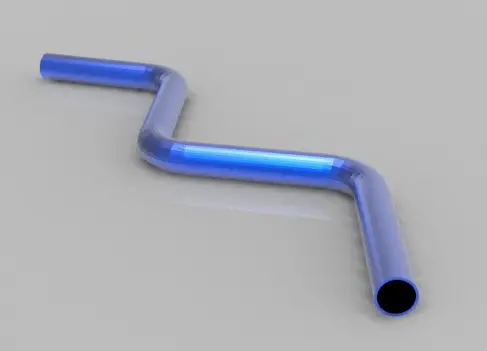
Seeing it on a different angle we get this

Now we can choose to use the SHELL command to finish up and have a better look.

Learn how to use the SHELL command if you are not familiar with it.
The result
How to create a pipe in AutoCAD: Basic Tutorial are done. If you need any tutorial to improve your skill in corel please visit other tutorial on this blog. Ok thanks for coming.
By computeraideddesignguide
No comments:
Post a Comment